News
Making a Felted Dragon! September 17, 2015 11:13 7 Comments
Some of our most frequently asked questions are about felted dragons. “How long did that dragon take to make?” “Did you use a pattern?” “Do you have a dragon kit?” “Are you going to have a dragon kit?” Since the answers to these questions are always the same: a long time, no, no, and probably not – I documented the last dragon I made in photos so, for those of you that are feeling ambitious and brave and want to try making one of your own you can see the steps I used to make one.
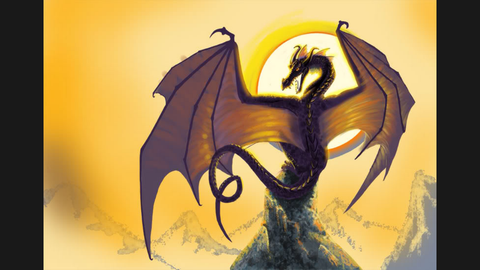
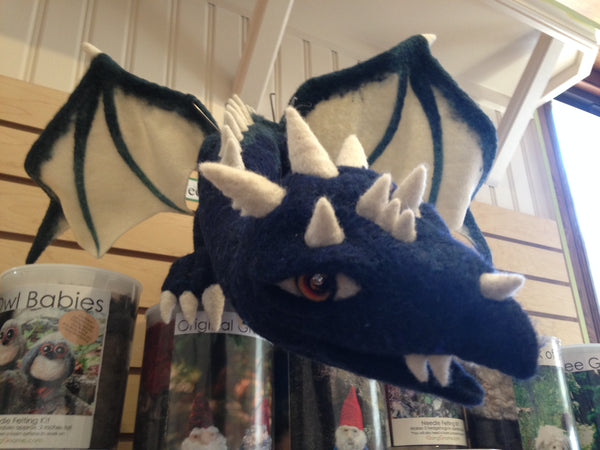
There are a lot of steps and pieces to making up a dragon. I usually decide on a color or range of colors I want to work with. (One dragon I made was completely designed around this vintage pair of buttons that I wanted to use for eyes.) The next thing I think about it size – how big do I want the dragon, and where might I want to display it. We often create dragons as part of our gnome environment. This dragon was designed to sit perched on top of our display tree. I wanted him to be lurking over the gnomes in a threatening way. I also wanted to make a completely different face style then I had ever made before. If you felt a lot you start to make things that all look alike. It can be difficult to breakout of the comfort zone a branch out. This had happened to me with my dragons, so I was determined to think outside the box for this one.
After I’ve decided what color my dragon is going to be, and how I want to display him (or where) I start look at “dragons” on Google images for inspiration pictures. I’m looking for interesting head shapes, leg positions, and body positions. Here are some of the images I used for this dragon:


Once I have a general concept, I begin with a foam coated wire the length of the dragon from snout to tail. This guy is about 3.5’ long. I start covering that with an un-dyed batting (no reason to have the more expensive dyed wool all the way through) I wrap the wool around the wire and felt as I go. This process is a little tedious. You can’t really work fast because if the needles hit the wire they break. This is one of the reasons we avoid working with armature as much as possible! I continue this wrap and felt process until I have a snake that’s about 2” in diameter. I knew I wanted this guy’s tail to wrap around the tree display that he would be perched on, so I felted this curvature into his tail right from the beginning.

Beginning the wrapping and felting process.....

In this picture you can see that I am starting to add bulk around the belly area. You can also see the colors I am planning to use there on the table.


One thing that I did on this dragon that I had never done before was to make the head as a completely separate piece. Jen and I do so much felting that we have to really watch out for physical stress and strain from it. When you are trying to sculpt and so fine detail (like eyes) It is cumbersome to be holding and turning the entire piece.
Once the body is felted and some shape has been set in, I start working on legs. Legs are a LOT of work! Feet, joints, toenails, and firmly felted enough to make the dragon stand! And there are 4 of them! Here are some pictures of the legs and feet in the works:


1. basic form 2. attaching the pieces 3. covering with color

4. Adding depth of color and talons! Don't forget there are 4 of these!
Once I finished the legs I had to attach them to the body. This is tricky and needs time and attention – for one thing you need a very strong attachment. You also want to make sure your dragon can stand firmly and be in the position you want. Lots to think about and lots of poking! I wanted to avoid this stage so I went ahead and made lots of spikes for decorating him later on.

Spikes, spikes, and more spike!!!!

When you can't avoid it any longer, go ahead and tackle that leg attachment!
Once the legs were attached it was on the fun part – the head! Once again I started with natural batting and planned to cover with color after I had the shape and size established. I put a foam cone in the neck and of the head to keep a hole that the neck could fit into when I was ready to put it all together. Dragon heads and faces are an amazing opportunity for getting creative and daring! As I said I wanted this head to look really different from past dragons. Keeping in mind I was going for fierce, and my dragons often turn out looking cute, I decided to make a pointed face and give him gold sharp looking eyes.


In these pictures you can also see the top and bottom eyelids that get attached around the eyes


One thing that often happens with dragons is that they take on their own look along the way. I often make parts that I don’t end up using later on because they just don’t suit the overall character. This neck piece I made looked great until I added the wings and then it just didn’t make sense. So….I ripped it off and voila he looked much better! Like I said they take on a life of their own.

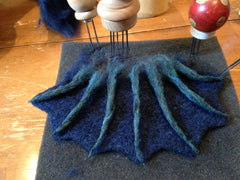
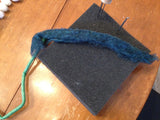
One of the most difficult parts of any dragon is the wings. You want them to be strong and durable, but also fine and ethereal. Ethereal can be very difficult to achieve in needle felting. I use wire across the top of the wings, I also build them as one piece. This helps them be able to be built strongly into the body. I used regular sheet felt for this set and felted batting into the felt for decoration. Going with white for the wings was a total wild card - I did it because that's what I had and I didn't want to go to the fabric store ;) I actually love the way they turned out!
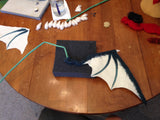
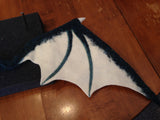
Once the wings were felted – I used one long wire across the top of both wings leaving a gap in the middle for attaching the wings to the body. With this dragon, once I had the wings built I realized the front legs weren’t quite right and needed to be added too before the wings could be attached – you can see there are lots of changes and modifications that go into making a dragon, as they influence their own creation. I finally got the wings on and 30 spikes on his head and back and voila! Finally finished! I love how he turned out, and am looking forward to seeing him lording over our gnome display at our shows this season. Hope this helps and inspires you to start your own dragon…….


Instructional Video Realeses May 5, 2015 14:37
Our first instructional video (FELT IT! Make Mini Gnomes) was released on April 29, 2015! We are very excited for the release of this video, and the 3 to follow in the next few months (Mushroom House, Owl Babies, and Sleeping Fox) It's been great working with Interweave, they are also carrying our kits in their on line store!
The link for the mini gnome and mushroom house videos are here, and I will continue to add the other links as they are released.
(The links for the videos can also be found on the corresponding felting kit page in our products catalog)
Felt it! Make a Mushroom Dwelling

Please check them out and let us know what you think!
Also check out Anita's blog post about our new videos on Spinning Daily!
Gnome Blog
Mothers and their Babies April 20, 2015 00:00
Our wonderful mother died this past November.
All through the coldest, longest, and darkest winter in recent memory,
all we could felt were mothers and their babies.
Some of our best felting to date!
Enjoy.....


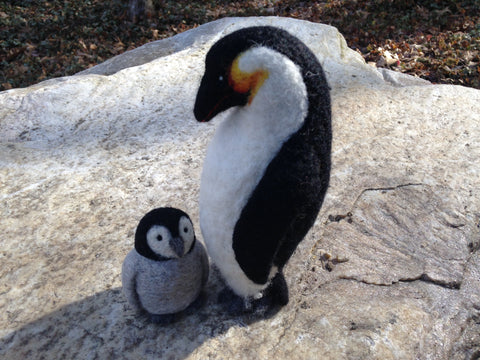
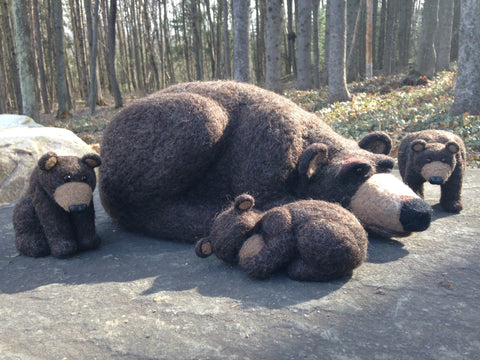


We miss you mom......
A felted chess Set April 13, 2015 00:00

As mentioned in the previous post we were invited to create an art piece for the gallery at Vogue Knitting Live in NYC. We decided to create a felted chess set, with the pieces consisting of Gnomes (obviously) vs. Vikings.
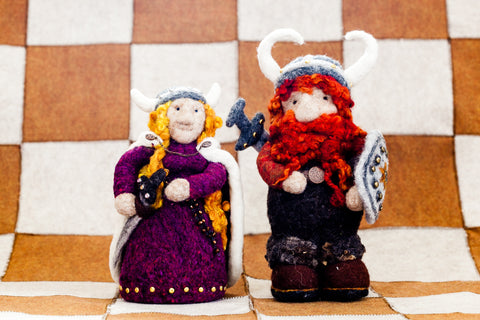
Viking King and Queen

Gnome King and Queen
We wanted the set to be larger than life so we chose to make it a 4ft. x 4ft. board with the pieces averaging around 12-14inches tall. It was a challenge to create pieces that people would be able to recognize as their traditional counterparts. Mushrooms were an obvious choice for the pawns on the gnome side, as were a gnome king and queen and viking king and queen. Bishops presented a bit of a representation challenge, being settled with tree gnomes on the gnome side and howling wolves on the viking side.

Gnome Bishops

Viking Bishops
Viking dragon riders and gnome bear riders were fun to make for the knights.

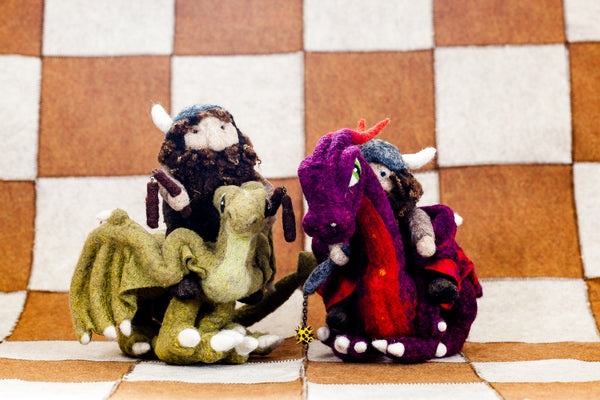
Viking Knights
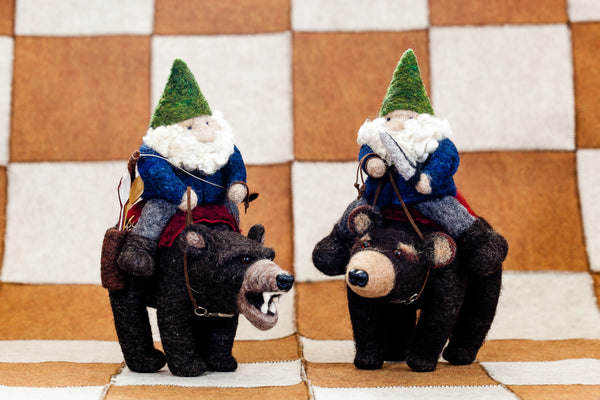
Gnome Knights
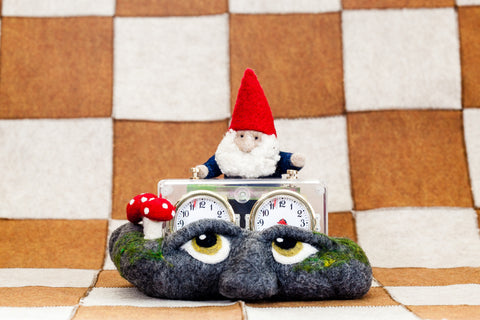
The most frequently asked questions about building this felted chess set were: How long did it take? Did you each make a side? Can i make a move? We spent a total of about 200 hours working on the set, and were thrilled with the results! We both worked on both sides, though one of us made each set of companion figures (ie I made both wolf bishops on the viking side and gnome king and queen, Jen made both dragon rider knights and the viking king and queen. We both spent many hours making mushroom and rock monster pawns! We did let people (carefully) play the game both in NY and in Seattle - boy are there are a lot of chess enthusiasts out there!! Most were thrilled that the set was complete with a chess clock and and a gnome time keeper!
New ideas for new large scale art pieces are always swirling around.....stay tuned....
INSTRUCTIONAL VIDEOS!!! April 10, 2015 12:52 1 Comment
SO Going Gnome's big news is that we have the first of 4 needle felting instructional videos being released later this month (APRIL 2015)!! The videos are being produced and distributed by F+W Interweave and will be available on craftdaily.com, as well as in the Interweave store. Earlier this year we flew out to Fort Collins Colorado for the video shoot. We had an amazing time, the crew at Interweave are amazing to work with, it was a blast! The 4 videos are
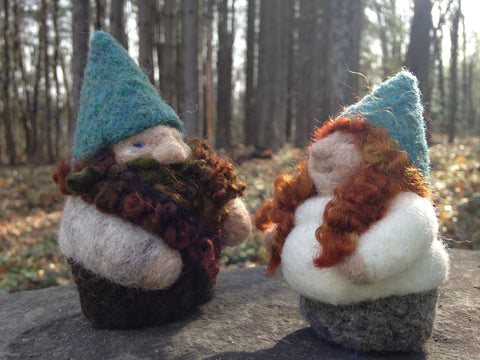
Mini Gnome
Mini Mushroom House
Owl Babies
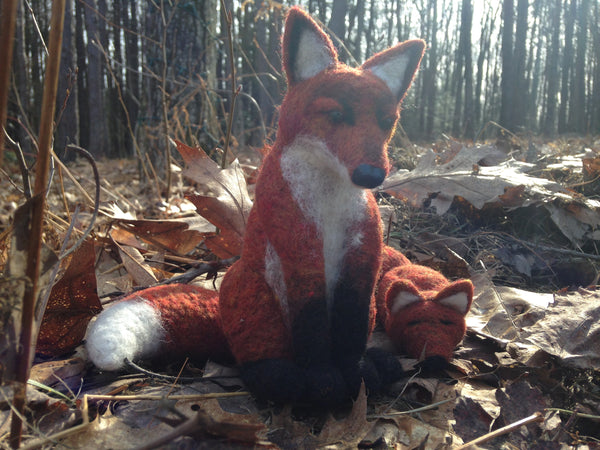
Sleeping Fox
The videos are going to be for sale and paired with our kits so you can felt right along with the instructions using our amazing kits. We will have links to the videos here on our website as soon as they are released so don't forget to check back soon :)
Here are some pictures from our trip out to Fort Collins.......

During filming: Mini Mushroom House


This sweetie was thrilled to be included on the set with her gnome friends

Filming videos is tiring!

All packed up and ready for the trip home.....
Going Gnome is getting a kick start! August 4, 2014 14:58
So, we've enlisted the help of our gnomes to get our kits packed with 100% US materials, and now in 100% US packaging! We have spent the past few months working hard to improve out great instructions - we've even added photo detail in them! The new kit design is amazing, but having the packaging made in the US means buying them in large quantity. The gnomes have launched this Kickstarter project to help us get the tubes here. Please check it out, share it with your friends, and back us if you can. You can get some great rewards - just a $25 pledge gets you a brand new, never before sold or seen felting kit - Prickle of Hedgehogs!!
Thanks for supporting us!